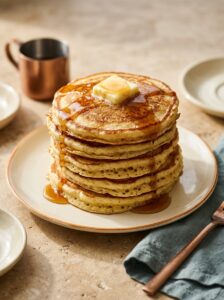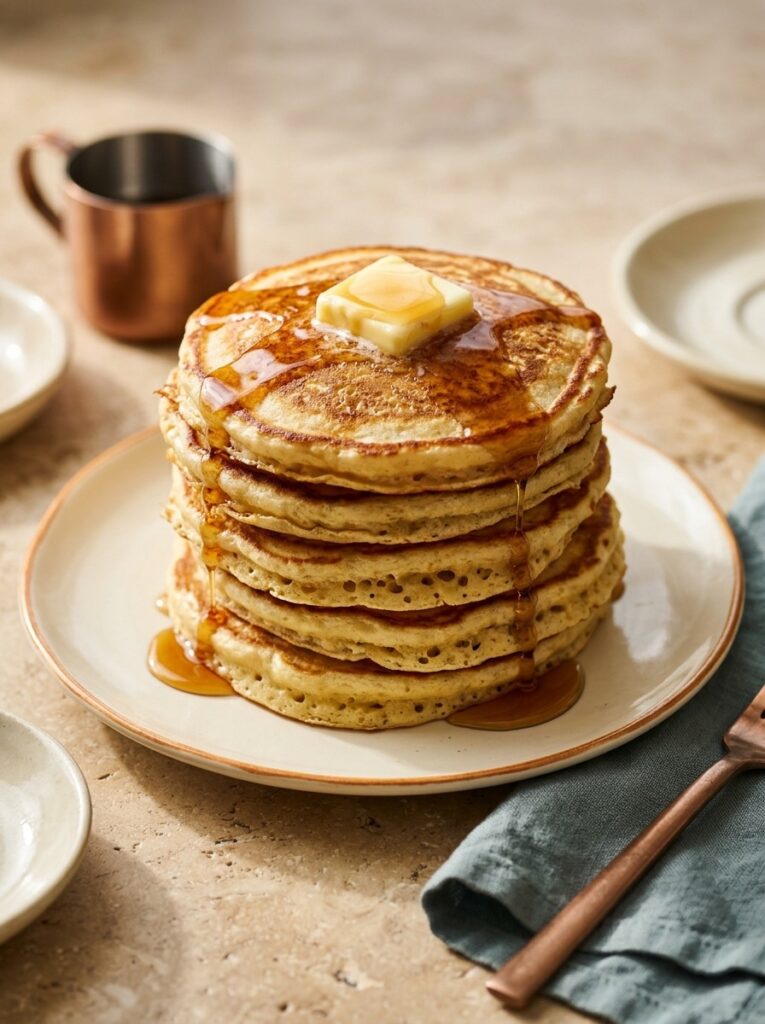
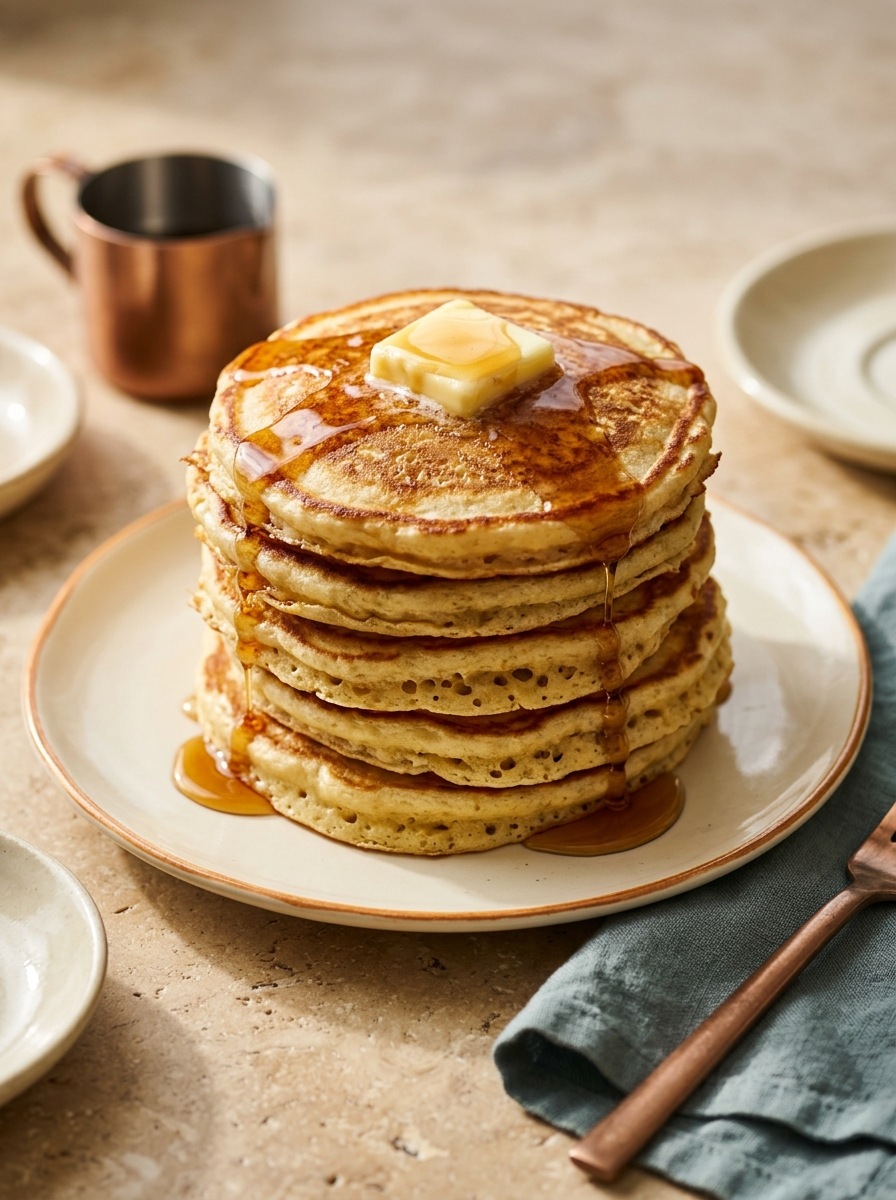
Rising a full half-inch high on the griddle with lacy, butter-crisp golden edges and a cloud-like interior, this best fluffy buttermilk pancakes recipe turns simple weekend pantry staples into a towering diner-style breakfast stack.
Why do so many homemade pancakes come off the skillet flat, rubbery, and pale, while classic American diner pancakes puff into thick, velvety pillows that soak up warm maple syrup without turning soggy? When we tested over a dozen ratios in our kitchen, we discovered that towering pancake height comes down to three exact chemical steps: real cultured buttermilk paired with dual leaveners, gentle lump-preserving folding, and a mandatory 10-minute counter rest before the first ladle ever touches the griddle.
First, many recipes use too much baking soda, which leaves a soapy, metallic aftertaste if there isn’t enough lactic acid in the buttermilk to neutralize it. By pairing 2 cups (480ml) of thick, full-fat cultured buttermilk with exactly 3/4 teaspoon of baking soda (for immediate acid-base carbon dioxide bubbles) and 1 Tablespoon of aluminum-free baking powder (which releases a second wave of lift only when heated on the 350°F / 177°C griddle), the batter rises twice—once in the bowl and again on the hot pan.
Second, over-whisking pancake batter until smooth is the fastest way to develop elastic wheat gluten tunnels that collapse after flipping. Folding the wet buttermilk mixture into the dry flour with a wide spatula until dime-sized lumps remain keeps the gluten relaxed.
Finally, resting the lumpy batter on the counter for 10 minutes allows the starch granules to hydrate fully while micro-bubbles of carbon dioxide become trapped inside a mousse-like foam—guaranteeing even the very first pancake of the batch cooks up thick, golden, and impossibly tender.
Why You’ll Love This Fluffy Buttermilk Pancakes Recipe
- Dual-Stage Leavening Lift: Baking soda reacts instantly with tangy buttermilk in the bowl while double-acting baking powder puffs the centers high on the hot skillet.
- The 10-Minute Mousse Batter Rest: Hydrates the flour starches and traps air pockets so your first pancake is just as tall and golden as the last.
- Crisp, Lacy Buttered Edges: Cooking in a light brush of clarified or melted butter + neutral oil at 350°F (177°C) creates that irresistible diner-style crispy rim.
- Zero Tough or Rubbery Crumb: Leaving small lumps in the batter and using melted cooled butter ensures a melt-in-your-mouth tender interior.
- Freezer-To-Toaster Weekday Hero: Leftover pancakes freeze and reheat in a standard toaster in 90 seconds with zero loss of fluffiness.
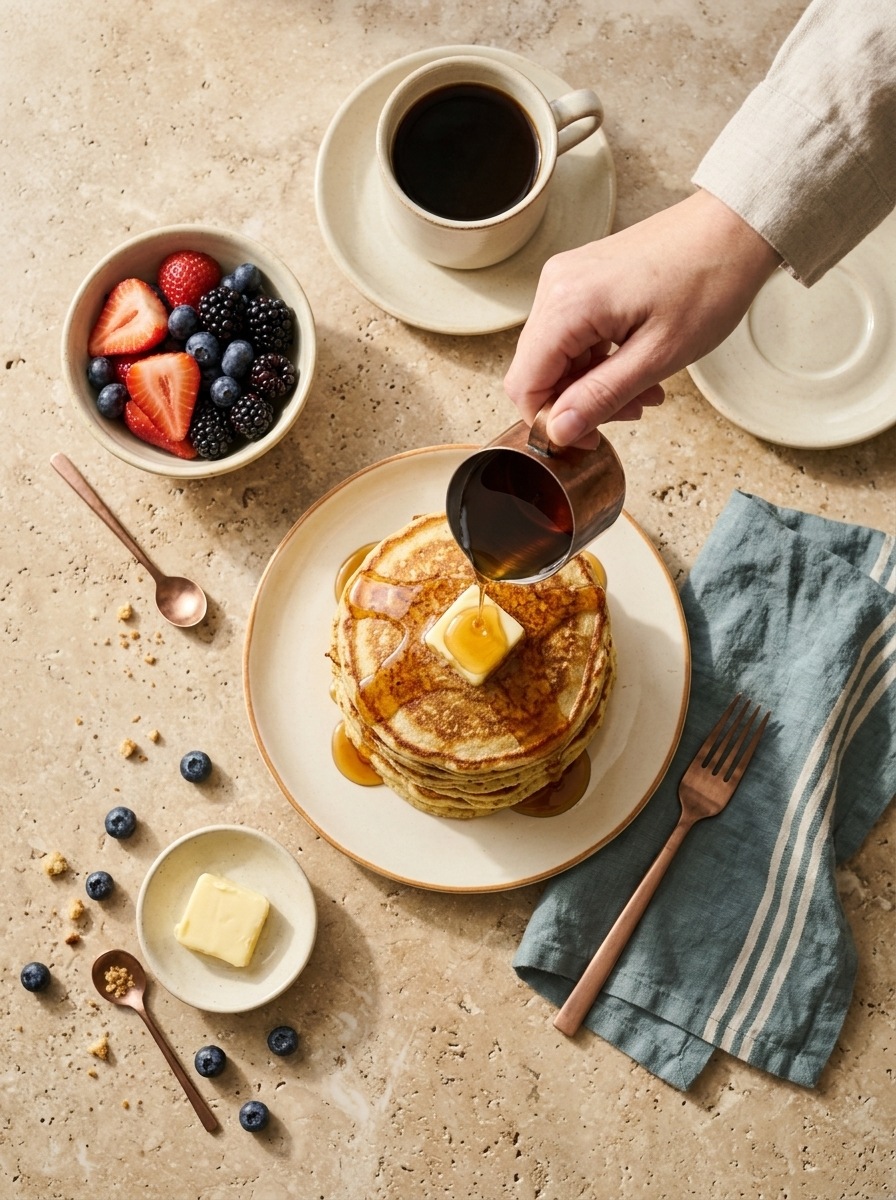
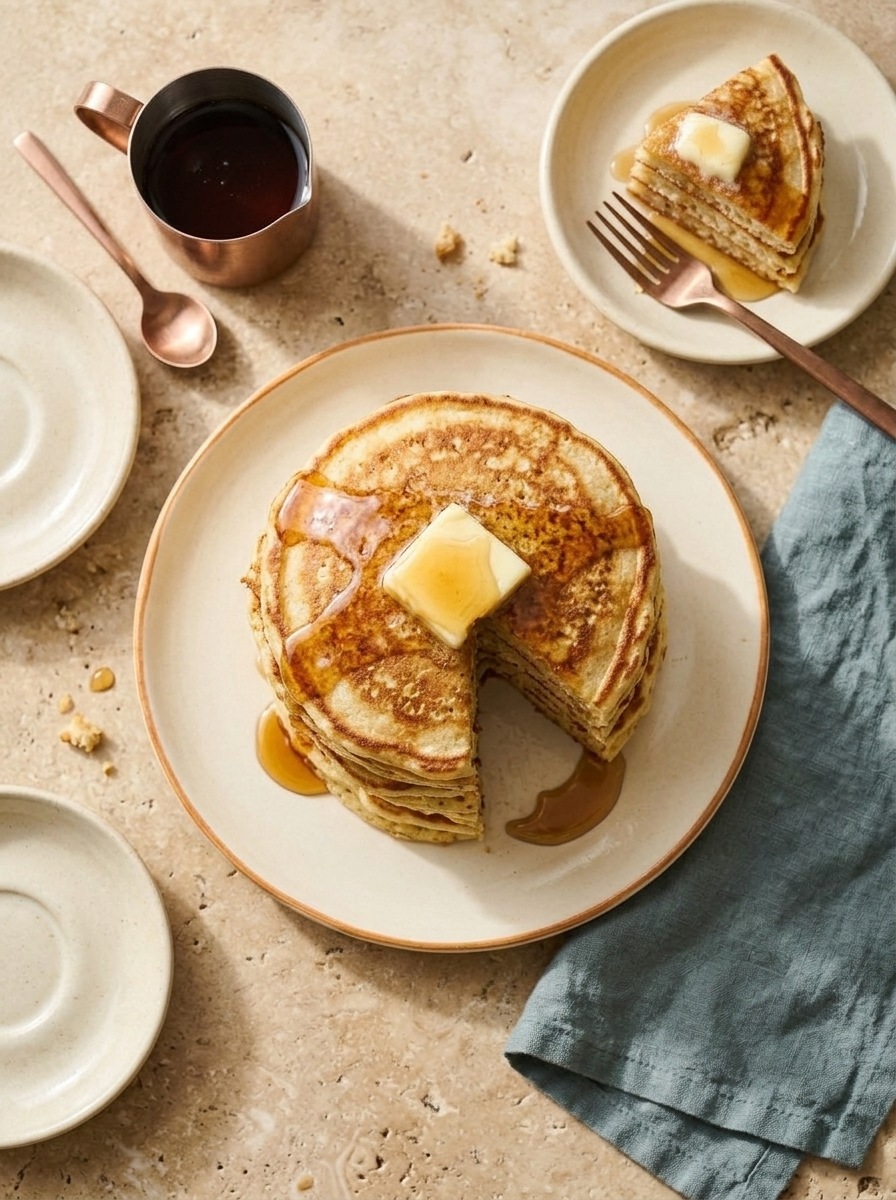
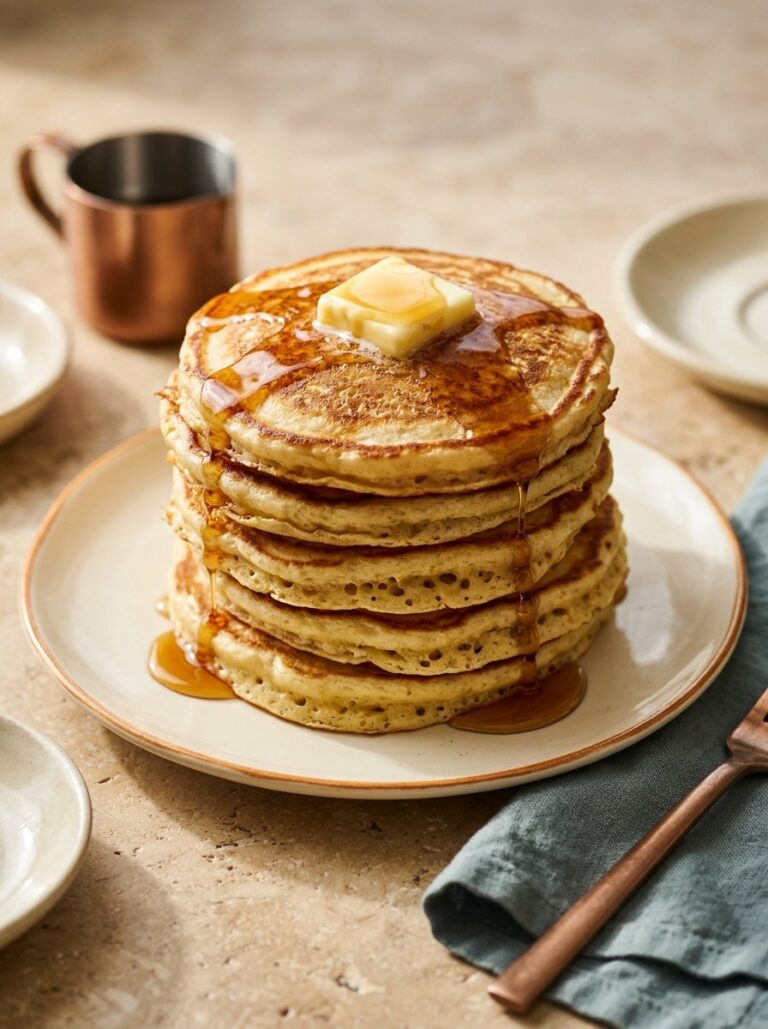
Stacked six high on a warm stoneware plate with a melting pat of salted butter, a cascade of dark amber maple syrup, and hot morning coffee, these pancakes turn any Sunday morning into a celebratory brunch.
Key Ingredients & Why Each One Matters
- All-Purpose Flour (2 cups / 250g, spooned & leveled): Provides the structural framework. Weighing or spooning-and-leveling prevents heavy, doughy centers.
- Full-Fat Cultured Buttermilk (2 cups / 480ml, room temperature): Thick, fermented dairy whose lactic acid tenderizes gluten strands and activates the baking soda for sky-high lift and signature tang.
- Baking Powder (1 Tablespoon / 12g, aluminum-free) & Baking Soda (3/4 teaspoon): The exact leavening ratio for half-inch-thick pancakes without any bitter or metallic aftertaste.
- Granulated Sugar (3 Tablespoons / 38g): Just enough sugar to promote even Maillard browning across the face of each pancake and balance the tangy buttermilk.
- Large Eggs (2 whole eggs, room temperature): Whisked lightly with the buttermilk before adding melted butter to provide structure and golden color.
- Unsalted Butter (4 Tablespoons / 56g, melted & cooled slightly, plus extra for griddle and serving): Enriches the crumb with toasted dairy flavor; cooling the butter for 5 minutes prevents it from clumping when whisked into the buttermilk.
- Pure Vanilla Extract (1 and 1/2 teaspoons) & Fine Sea Salt (3/4 teaspoon): Perfumes the batter with bakery warmth and sharpens the buttery notes.
- Pure Grade A Maple Syrup (for serving): Warmed gently before pouring so it absorbs into the hot pancakes without cooling the stack.
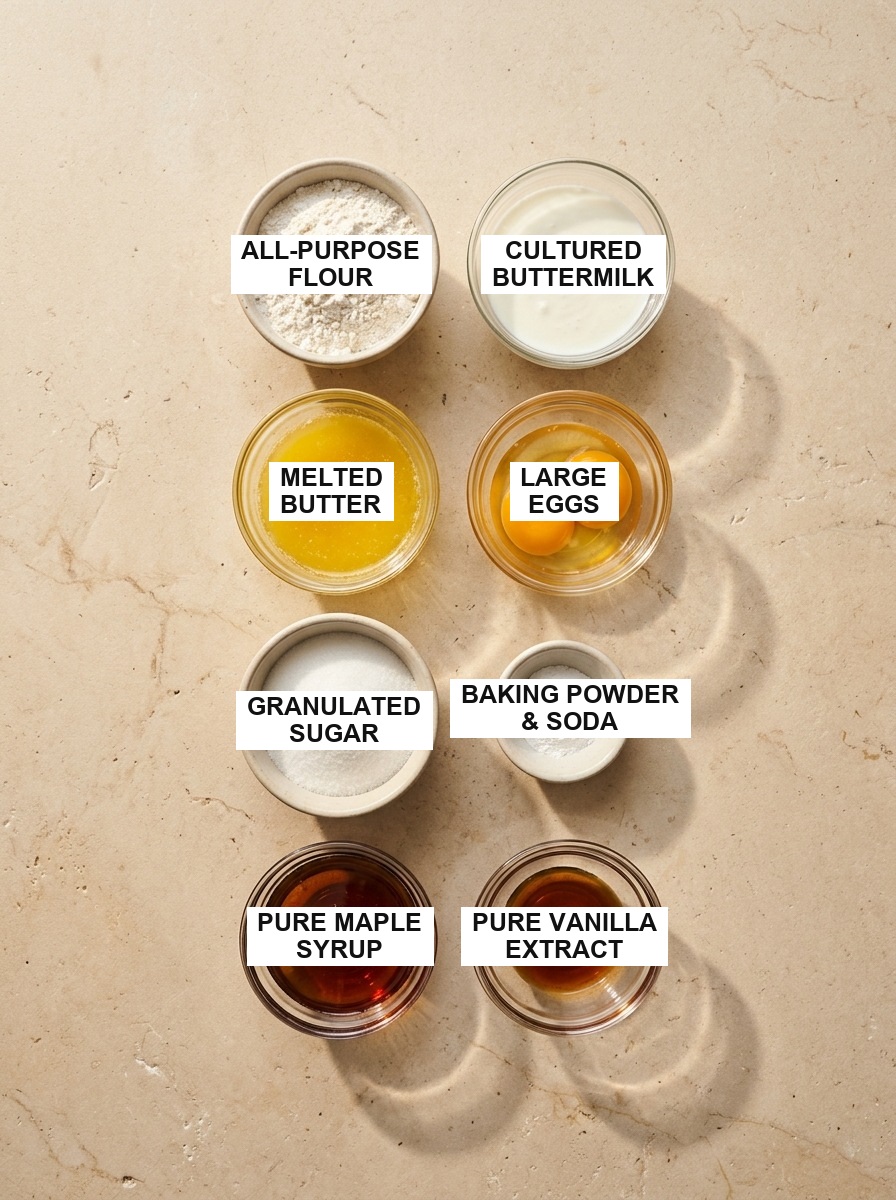
Take your buttermilk and eggs out of the fridge 30 minutes ahead (or warm the buttermilk for 20 seconds in the microwave to take off the chill) so your melted butter blends smoothly into the wet base without hardening into tiny flecks.
Start by Whisking the Dry Base & Emulsifying the Buttermilk Wet Mix
In a large, wide mixing bowl, whisk together the 2 cups (250g) of spooned-and-leveled all-purpose flour, 3 tablespoons (38g) of granulated sugar, 1 tablespoon of aluminum-free baking powder, 3/4 teaspoon of baking soda, and 3/4 teaspoon of fine sea salt for 30 seconds. Whisking the dry ingredients thoroughly distributes the leaveners evenly so every pancake rises to the same height.
In a separate medium glass bowl or large liquid measuring pitcher, whisk the 2 room-temperature eggs, 2 cups (480ml) of room-temperature cultured buttermilk, and 1 and 1/2 teaspoons of pure vanilla extract until smooth and pale yellow. Slowly drizzle in the 4 tablespoons (56g) of melted, slightly cooled unsalted butter while whisking gently.
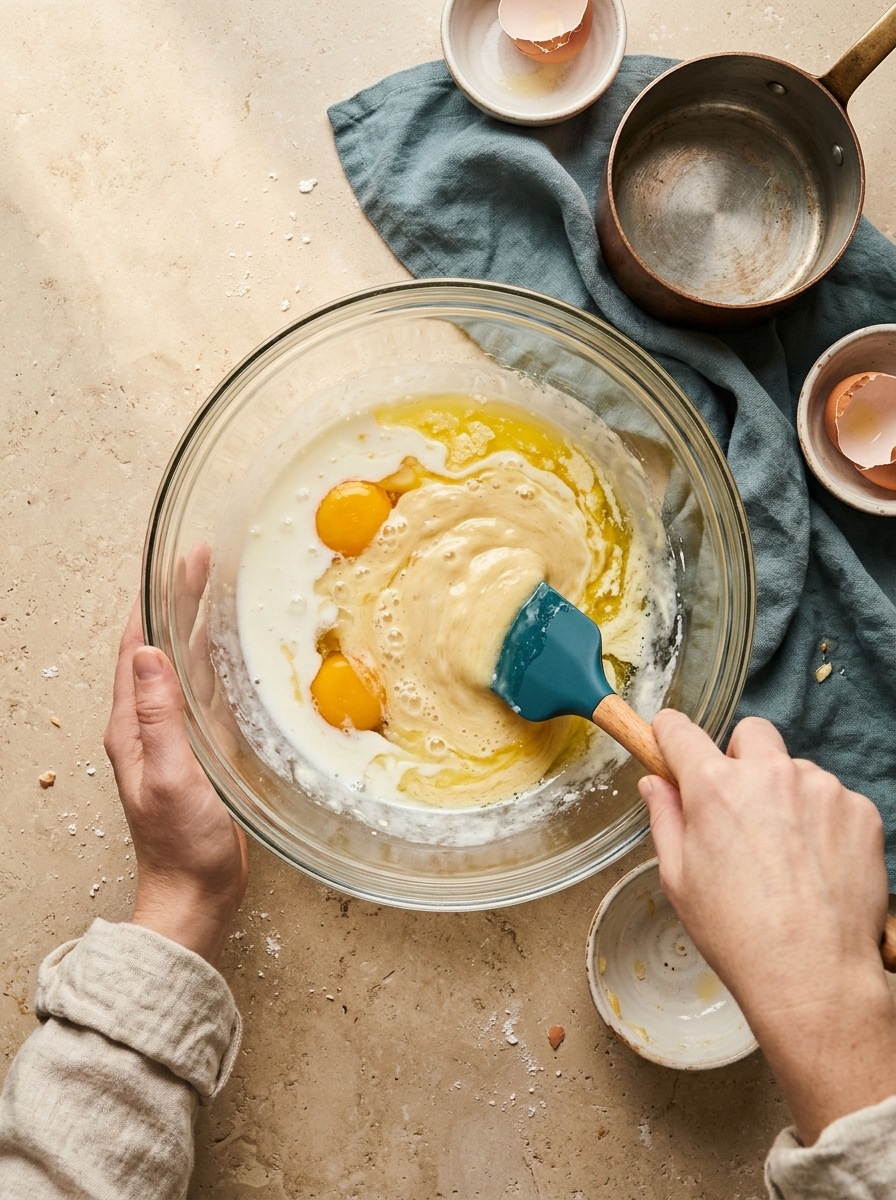
Make a shallow well in the center of your dry flour mixture and pour the wet buttermilk emulsion directly into the well. Switch immediately from your whisk to your wide silicone spatula.
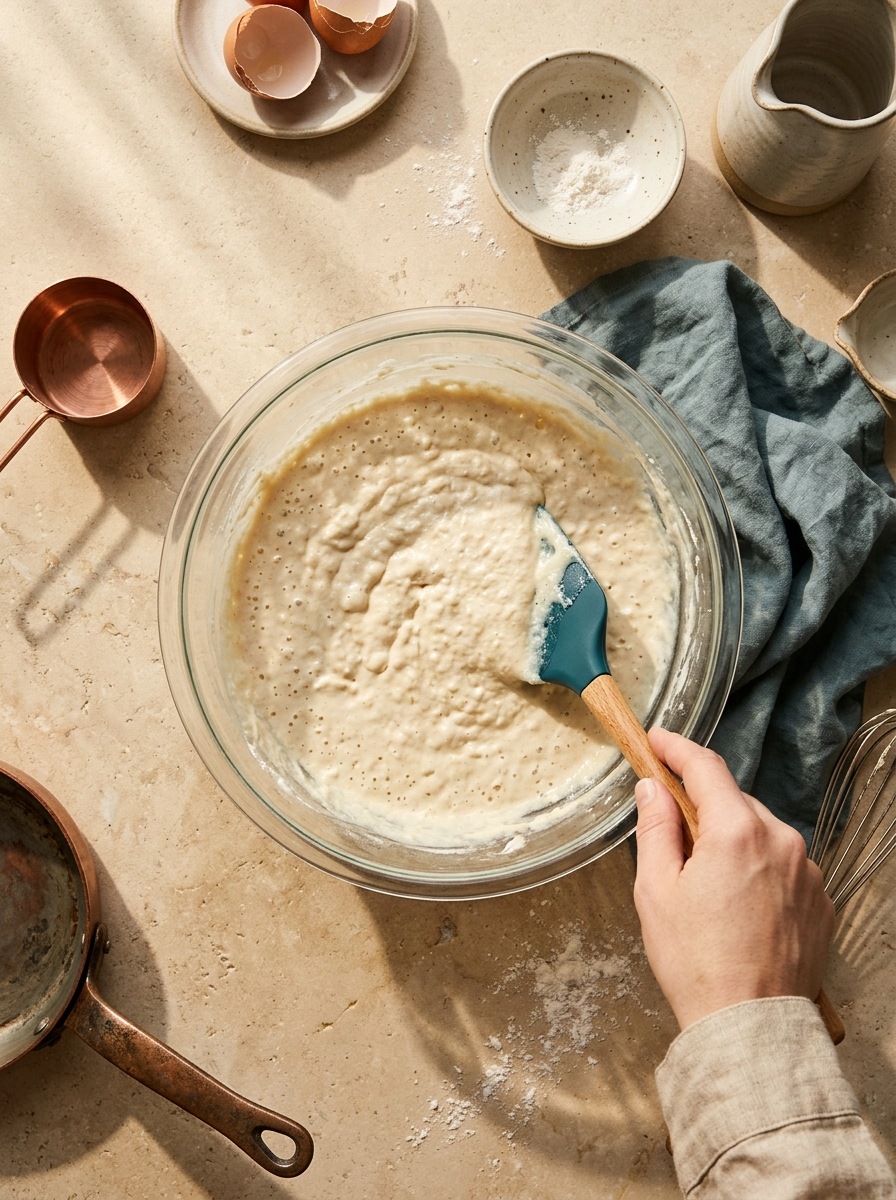
Using a gentle J-stroke folding motion—sweeping down the side of the bowl, across the bottom, and folding over the top while rotating the bowl a quarter turn—combine the wet and dry ingredients in about 12 to 15 strokes. Stop the moment the large pockets of dry flour disappear! The batter should look thick, billowy, and noticeably lumpy (with small pea-sized lumps throughout). Cover the bowl with a clean towel and let the batter rest undisturbed on the counter for 10 full minutes while you preheat your skillet or griddle.
The Secret to Towering Diner Pancakes: The 10-Minute Rest & 350°F Griddle Test
After resting for 10 minutes, look closely at the surface of your bowl: you will see dozens of tiny bubbles dimpling a thick, mousse-like batter. Resist the temptation to stir the batter again! Stirring after the rest pops all the carbon dioxide micro-bubbles that the buttermilk and baking soda just spent 10 minutes building. Instead, scoop straight from the top of the rested batter with a 1/3-cup measuring cup or ice cream scoop.
Equally critical is preheating a heavy cast-iron skillet, copper-clad stainless pan, or electric griddle over medium-low heat for a full 5 minutes until the surface reaches 350°F (177°C). If you don’t have an electric griddle with a thermostat, flick three droplets of cold water onto the dry pan: if they sit and hiss slowly, the pan is too cool; if they explode instantly into mist, it is too hot; if they skitter and dance across the metal like mercury beads for 3 seconds before vanishing, you are at the exact 350°F sweet spot.
Chef’s Pro Tips & Kitchen Testing Notes
- Keep Small Lumps in the Batter: Over-mixing creates tough gluten strands that flatten pancakes; 12 to 15 gentle folds with a spatula is all you need.
- Never Stir the Batter After the 10-Minute Rest: Gently ladle from the top edge of the foamy, rested bowl so every trapped air bubble transfers onto the hot griddle.
- Flip Only When Bubbles Pop and Stay Open: Wait until bubbles form across the center (not just the rim), pop open into tiny craters that don’t fill back in, and the bottom edge looks matte and golden.
How to Cook Fluffy Buttermilk Pancakes (Step-by-Step Guide)
Preheat your oven to 200°F (93°C) and place a wire cooling rack set inside a rimmed baking sheet on the center oven rack—keeping finished pancakes in a single layer on an open wire rack (never stacked under foil, which steams them soft) preserves their crisp edges while you cook the rest of the batch.
Lightly brush your preheated 350°F (177°C) skillet with a thin sheen of melted butter and a drop of neutral oil, wiping away any excess with a folded paper towel so the pancakes brown evenly with a mahogany diner finish.
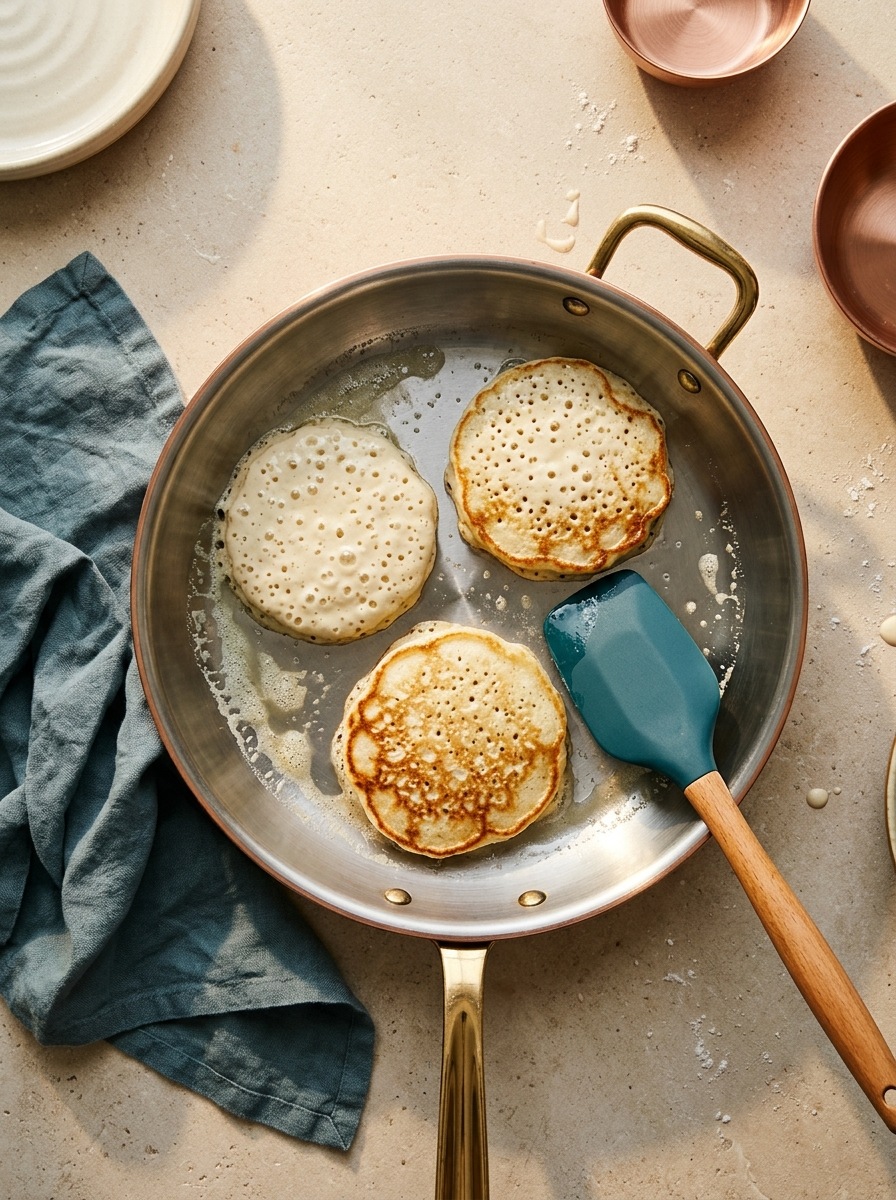
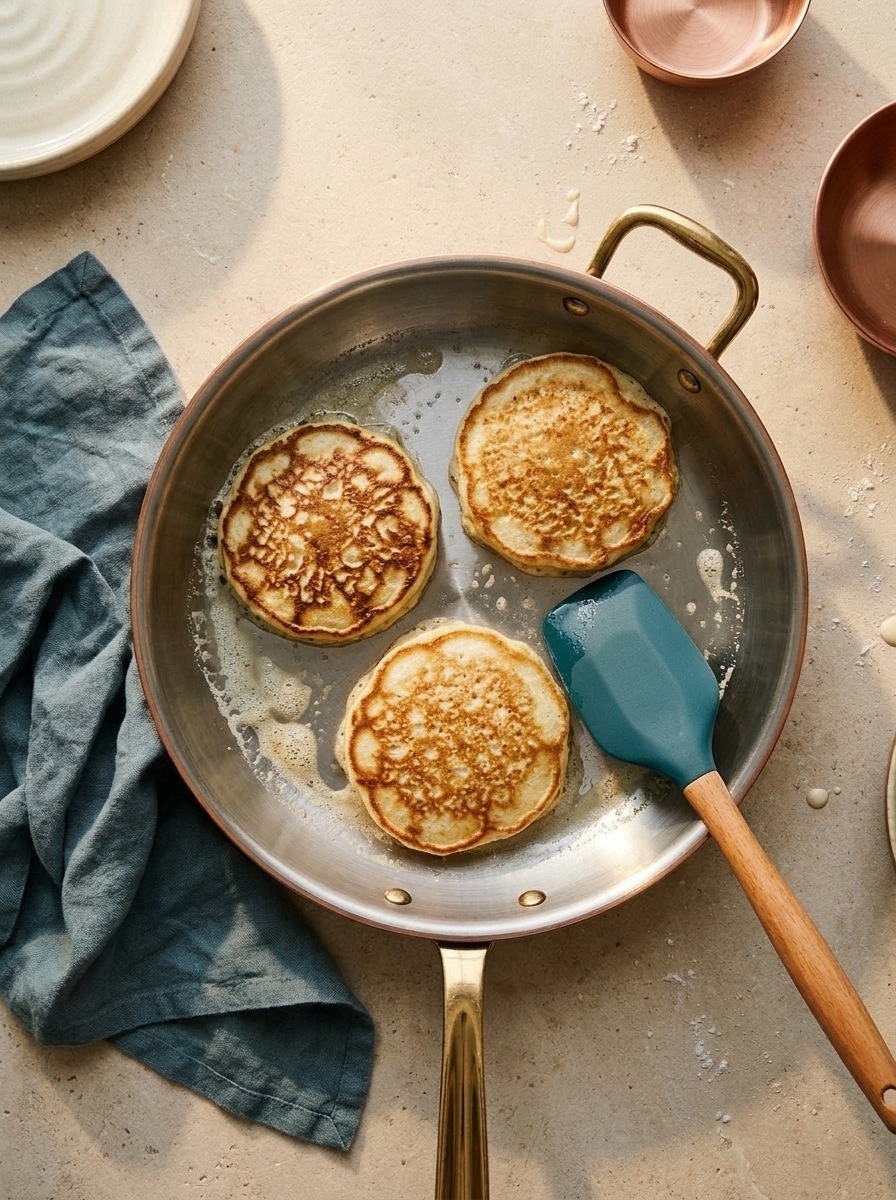
Scoop scant 1/3-cup (80ml) portions of the rested batter onto the skillet, leaving at least 2 inches of breathing room between rounds. Cook undisturbed for 2.5 to 3 minutes. Watch the visual cues: first, the outer 1/2-inch rim will puff and turn matte; next, bubbles will rise across the entire surface and pop open, leaving little craters that stay open rather than closing back up with raw batter.
Slide a thin, wide spatula cleanly underneath each pancake and flip with a quick, confident wrist turn (avoid pressing down on the flipped pancake with your spatula, which squashes out the steam pockets!). Cook on the second side for 90 seconds to 2 minutes until the underside is deep golden-brown and the center springs back lightly when tapped.
Transfer cooked pancakes to the warm oven rack, wipe and lightly re-butter the skillet between batches, and serve stacked high with softened salted butter and warm pure maple syrup.
Common Mistakes to Avoid
- Using expired baking powder: Baking powder loses its double-acting punch after 6 months in a humid pantry. Test yours by dropping 1/2 teaspoon into warm water—if it doesn’t fizz vigorously on contact, open a fresh tin.
- Pressing down on pancakes with the spatula after flipping: Pressing a rising pancake deflates the expanding steam and carbon dioxide cells, turning a fluffy half-inch cake into a dense hockey puck.
- Flipping too early when bubbles first appear around the edges: If the center bubbles haven’t popped and stayed open yet, the raw batter in the middle will splash outward when flipped, creating uneven thickness.
- Pouring cold butter into cold fridge-temperature buttermilk: Even if the butter is melted, cold 38°F (3°C) buttermilk shocks the butterfat into solid clumps. Wait until the buttermilk and eggs are near room temperature (or barely lukewarm).
Substitutions & Flavor Variations
- Bursting Wild Blueberry Buttermilk Pancakes: Do not fold blueberries into the bowl (which bruises them and turns the batter grey). Instead, scatter 1.5 tablespoons of fresh or frozen wild blueberries onto the wet top of each pancake right after ladling onto the griddle.
- Chocolate Chip Banana Diner Pancakes: Scatter thin coins of ripe banana and mini semi-sweet chocolate chips onto the top of each pancake during the first 60 seconds on the skillet.
- Lemon Ricotta Buttermilk Pancakes: Replace 1/2 cup of the buttermilk with 1/2 cup of whole-milk ricotta cheese and rub 1 Tablespoon of fresh lemon zest into the granulated sugar before whisking.
- Cinnamon Swirl Roll Pancakes: Pipe a spiral of melted butter, brown sugar, and ground cinnamon over each pancake 60 seconds after pouring onto the griddle, then flip carefully.
Make-Ahead, Storage & Reheating Guide
Keeping Pancakes Warm for a Crowd: Arrange cooked pancakes in a single layer on a wire cooling rack set over a sheet pan in a 200°F (93°C) oven for up to 30 minutes. Air circulates underneath the wire rack so the bottoms never steam or get soggy.
Refrigerator Storage: Cool leftover pancakes completely on a wire rack, then store in an airtight container or zip-top bag lined with a paper towel in the refrigerator for up to 4 days.
Freezing & Toaster Reheating (Up to 3 Months): Flash-freeze cooled pancakes in a single layer on a parchment-lined tray for 45 minutes, then stack them with small squares of wax paper between each pancake inside a freezer bag. To reheat straight from frozen, pop them into a standard bread toaster on medium-low for 90 seconds (or heat in a 350°F / 177°C oven for 7 minutes) for crisp edges and a fluffy hot center.
Frequently Asked Questions
What if I don’t have real cultured buttermilk on hand?
Real thick cultured buttermilk gives the best loft and tang, but in a pinch you can make an acidulated milk substitute: stir 2 Tablespoons (30ml) of fresh lemon juice or white distilled vinegar into a 2-cup measuring pitcher, fill to the 2-cup (480ml) line with whole milk (or 1.5 cups milk + 1/2 cup sour cream/plain Greek yogurt), and let sit for 10 minutes until thickened.
Can I make buttermilk pancake batter the night before?
We do not recommend mixing the wet and dry ingredients the night before because the baking soda and baking powder expend their carbon dioxide lift within 45 minutes. Instead, whisk the dry ingredients in one covered bowl on the counter and the wet ingredients in a covered jar in the fridge at night, then fold them together in 60 seconds in the morning!
Why did my first pancake look pale and blotchy while the second batch looked golden?
A pale, uneven ring happens when there is too much pooled oil or butter sitting in the skillet before the first pour. Wipe the preheated skillet with a paper towel so only a microscopic film of fat remains—that gives you uniform, smooth golden-brown diner color.
Can I make this recipe with whole wheat flour or gluten-free flour?
Yes! You can replace up to half (1 cup / 125g) of the all-purpose flour with white whole wheat flour without losing fluffiness, or swap 100% of the flour with a 1:1 gluten-free baking flour blend (such as King Arthur Measure for Measure), letting the gluten-free batter rest for 15 minutes before cooking.
The Final Result & Serving Suggestions
When you cut a forkful down through a warm stack of these buttermilk pancakes, you feel the light crispness of the golden-buttered rim give way to a tall, airy, velvety crumb that holds onto every drop of pure maple syrup.
Serve them piping hot off the skillet with a pat of salted butter, warm Grade A dark maple syrup, fresh seasonal berries, and crisp thick-cut bacon on the side.
Once you master the 10-minute lumpy batter rest and the 350°F griddle test, your kitchen becomes the best breakfast spot in town.
Best Fluffy Buttermilk Pancakes Recipe (Diner-Style)
Towering a full half-inch thick with lacy butter-crisp golden edges and a cloud-soft tangy crumb, these diner-style buttermilk pancakes use a dual-leavening ratio and a 10-minute batter rest for foolproof results.
- Total Time: 35 minutes
- Yield: 12 thick pancakes (4 servings) 1x
Ingredients
Dry Pancake Base
- 2 cups (250g) all-purpose flour (spooned & leveled)
- 3 Tablespoons (38g) granulated sugar
- 1 Tablespoon (12g) aluminum-free baking powder
- 3/4 teaspoon baking soda
- 3/4 teaspoon fine sea salt
Cultured Buttermilk Wet Emulsion
- 2 cups (480ml) full-fat cultured buttermilk, at room temperature
- 2 large eggs, at room temperature
- 1 and 1/2 teaspoons pure vanilla extract
- 4 Tablespoons (1/2 stick; 56g) unsalted butter, melted and cooled for 5 minutes (plus extra for skillet and serving)
- Warm pure Grade A maple syrup, for serving
Instructions
- Whisk Dry Ingredients: In a large mixing bowl, whisk together the flour, granulated sugar, baking powder, baking soda, and fine sea salt for 30 seconds until evenly combined. Make a well in the center.
- Whisk Wet Emulsion: In a medium bowl or large glass pitcher, whisk together the room-temperature buttermilk, eggs, and vanilla extract until smooth. Slowly drizzle in the melted, slightly cooled butter while whisking gently.
- Fold Gently (Keep Lumps!): Pour the wet mixture into the well of dry ingredients. Using a wide silicone spatula, fold gently in 12 to 15 strokes just until the large pockets of dry flour disappear. The batter should be thick and lumpy—do not overmix.
- Rest Batter 10 Minutes: Let the bowl sit undisturbed at room temperature for 10 minutes while the starches hydrate and tiny bubbles form across the surface. Do not stir the batter again after resting.
- Preheat Skillet & Cook: Heat a large cast-iron skillet, stainless-steel pan, or griddle over medium-low heat (350°F / 177°C) for 5 minutes. Brush lightly with melted butter and wipe off excess with a paper towel. Scoop scant 1/3-cup (80ml) portions of batter onto the hot surface. Cook for 2.5 to 3 minutes until the edges look matte and bubbles across the center pop open and stay open.
- Flip & Serve Warm: Flip carefully with a wide spatula (never press down!) and cook for 90 seconds to 2 minutes on the second side until deep golden-brown and puffed. Keep finished pancakes warm on a wire rack in a 200°F (93°C) oven, then serve stacked with butter and warm maple syrup.
Notes
- Make Ahead & Freezing: Freeze cooled leftover pancakes in a single layer, then stack between wax paper in a freezer bag for up to 3 months; reheat directly from frozen in a toaster for 90 seconds.
- Special Tools: 12-inch skillet or electric griddle, wide silicone spatula, and wire cooling rack.
- Pro Tip: Never stir the batter after its 10-minute rest—scoop gently from the top so all the trapped leavening bubbles stay intact.
- Prep Time: 10 minutes
- Cook Time: 15 minutes
- Category: Breakfast
- Method: Griddle / Skillet
- Cuisine: American
Nutrition
- Serving Size: 3 thick pancakes (without syrup)
- Calories: 390 kcal
- Sugar: 14g
- Sodium: 680mg
- Fat: 15g
- Saturated Fat: 8.8g
- Carbohydrates: 51g
- Fiber: 1.6g
- Protein: 12g
- Cholesterol: 128mg